Listing graphics in order of appearance – Part 2

Since we want a list of graphics, there are a couple of ways to approach this. First, we can write our report at the same time as we are collecting the data. Or, we can collect all of the data first, and then write the report. I prefer the second approach because it tends to make the code simpler to understand.

What kind of data should we collect? It all depends on our needs but it usually doesn’t hurt to collect more than we need in case we need it later. Here is what I would suggest collecting:

  • The absolute path to the imported graphic.
  • The absolute path to the FrameMaker document containing the graphic.
  • The page number.
  • The unique ID of the anchored frame containing the graphic. This will allow us to build a hypertext link from the report to the graphic if desired.

Here is a function we can use to create a data structure to hold the graphic data. There are several ways that this could be done, but this approach uses a series of parallel lists to hold the data.

Set oImageData = GetDataStructure{};

Function GetDataStructure
//
Local Result(eUtl.EStructure{});

// Add a string list to hold the graphic paths.
Result.Graphics = eUtl.StringList{};

// Add a string list to hold the document paths.
Result.Docs = eUtl.StringList{};

// Add a string list to hold the page numbers.
Result.Pages = eUtl.StringList{};

// Add an integer list to hold the unique ids of the anchored frames.
Result.Uniques = eUtl.IntList{};
//
EndFunc //--------------------------------------------------------------------

This function will show you how to add to the data structure for each anchored frame.

Function ProcessAFrame oAFrame oImageData oDoc
//
Local oGraphic(0);

// Loop through the graphics in the anchored frame.
Set oGraphic = oAFrame.FirstGraphicInFrame;
Loop While(oGraphic)
  // Test for an imported graphic.
  If oGraphic.ObjectName = 'Inset'
    // See if it was imported by reference.
    If oGraphic.InsetFile <> ''
      // Add the data to the data structure.
      Add Member(oGraphic.InsetFile) To(oImageData.Graphics);
      Add Member(oDoc.Name) To(oImageData.Docs);
      Add Member(oAFrame.Page.PageNumString) To(oImageData.Pages);
      Add Member(oAFrame.Unique) To(oImageData.Uniques);
    EndIf
  EndIf
  Set oGraphic = oGraphic.NextGraphicInFrame;
EndLoop
//
EndFunc //--------------------------------------------------------------------

You will have to pass this oImageData object into your functions as you navigate the paragraphs and anchored frames in your document (or book). Let me backtrack and rework the code from the last post. I am just going to just post shells of the existing functions and point out what is different. See if you can put the pieces together.

// Test for an active document or book.
If (ActiveDoc = 0) and (ActiveBook = 0)
  MsgBox 'Please open a document or book.    ';
  LeaveSub; // Exit the script.
EndIf

// Call the function to make the empty data strucure.
Set oImageData = GetDataStructure{};

If ActiveBook
  // Book code can be added later.
  // Set iResult = ProcessBook{ActiveBook,oImageData};
Else
  Set iResult = ProcessDoc{ActiveDoc,oImageData};
EndIf

// Now write the report with the data.
// ... Call a report writing function here ...

Function ProcessDoc oDoc oImageData
//
Local i(0), tTextList(0), iResult(0);

// Lines 4 through 11 of the second code listing in the previous post go here.
// Line 8 will be replaced with this:
Set iResult = ProcessParagraph{oPgf,oImageData,oDoc};
//
EndFunc //--------------------------------------------------------------------

Function ProcessParagraph oPgf oImageData oDoc
//
Local tTextList(0), i(0), oAFrame(0), iResult(0);

// Lines 3 through 10 of the ProcessParagraph function in the previous post
// go here. Line 9 will be replaced with a call to the ProcessAFrame
// function in this post (above).
Set iResult = ProcessAFrame{oAFrame,oImageData,oDoc};
//
EndFunc //--------------------------------------------------------------------

Function ProcessTable oTbl oImageData oDoc
//
// This is the function from lines 17 to 45 of the second code listing in the
// previous post. Everything is the same, except we added a couple of
// parameters to line 17. Line 19 will now be:
Local oCell(0), oPgf(0), iResult(0);

// Lines 24, 32, and 40 will now contain this:
Set iResult = ProcessParagraph{oPgf,oImageData,oDoc};
//
EndFunc //--------------------------------------------------------------------

See if you can put it all together from both posts and make it work. You can test it by adding this line after line 18 in the previous code listing:

Display oImageData.Graphics;

This should display a list of the graphic names in a message box. Note that if you have a ton of graphics in your document, you might not see the entire dialog box. You should be able to press Enter or Escape to dismiss it if you can’t see the OK/Cancel buttons. Alternatively, you can write the list to the FrameMaker Console window by using this:

Write Console oImageData.Graphics;

In another post, we can explore how to write the report. Comments or questions are welcome.
Listing graphics in order of appearance

Jonathan asked on the FrameScript list on yahoo groups about getting a list of graphic files in a document in order of appearance. I decided to answer it here so I can discuss it in some detail and because yahoo groups doesn’t format code listings very well. There are a couple of possibilities to consider. First, if you don’t have any graphics in tables, you can do something simple like this:

// Set a variable for the active document.
Set oDoc = ActiveDoc;

// Loop through all of the anchored frames in the main text flow.
Get TextList InObject(oDoc.MainFlowInDoc) FrameAnchor NewVar(tTextList);
Loop While(i <= tTextList.Count) LoopVar(i) Init(1) Incr(1)
  // Get each anchored frame.
  Set oAFrame = tTextList[i].TextData;
  // Get the information on the imported graphic(s) inside the text frame here.
  // ...
EndLoop

If you have anchored frames inside of tables, then things get a little more complicated. Here is a basic loop for processing all of the paragraphs in document order, including those in tables:

// Set a variable for the active document.
Set oDoc = ActiveDoc;

// Set a variable for the first paragraph in the main text flow.
Set oPgf = oDoc.MainFlowInDoc.FirstPgfInFlow;
// Loop through the paragraphs in the main text flow.
Loop While(oPgf)
  
  // Process any tables in the paragraph.
  Get TextList InObject(oPgf) TblAnchor NewVar(tTextList);
  Loop While(i <= tTextList.Count) LoopVar(i) Init(1) Incr(1)
    Set iResult = ProcessTable{tTextList[i].TextData};
  EndLoop
  Set oPgf = oPgf.NextPgfInFlow;
EndLoop

Function ProcessTable oTbl
//
Local oCell(0), oPgf(0);

If oTbl.TblTitlePosition = TblTitleAbove
  Set oPgf = oTbl.FirstPgf;
  Loop While(oPgf)
    
    Set oPgf = oPgf.NextPgfInFlow;
  EndLoop
EndIf
Set oCell = oTbl.FirstRowInTbl.FirstCellInRow;
Loop While(oCell)
  Set oPgf = oCell.FirstPgf;
  Loop While(oPgf)
  
    Set oPgf = oPgf.NextPgfInFlow;
  EndLoop
  Set oCell = oCell.NextCellInTbl;
EndLoop
If oTbl.TblTitlePosition = TblTitleBelow
  Set oPgf = oTbl.FirstPgf;
  Loop While(oPgf)
    
    Set oPgf = oPgf.NextPgfInFlow;
  EndLoop
EndIf
//
EndFunc //--------------------------------------------------------------------

This is a general purpose script for processing paragraphs in document order. Lines 8, 24, 32, and 40 are where you do something with each paragraph. In this case, we can call a function on each of these lines to get any anchored frames that are in each paragraph. The function would be similar to the first code example, except that it would get any anchored frames in each paragraph instead of the entire main flow.

Function ProcessParagraph oPgf
//
// Loop through all of the anchored frames in the paragraph.
Get TextList InObject(oPgf) FrameAnchor NewVar(tTextList);
Loop While(i <= tTextList.Count) LoopVar(i) Init(1) Incr(1)
  // Get each anchored frame.
  Set oAFrame = tTextList[i].TextData;
  // Get the information on the imported graphic(s) inside the text frame here.
  // ...
EndLoop
//
EndFunc //--------------------------------------------------------------------

There are some unfinished pieces here, like how to query each anchored frame for imported graphic information. Also, you will need a way to collect the graphic data. But this will get you started. Questions and comments are welcome. If there is enough discussion generated, we can go further with this.

Adobe Webinar: FrameMaker ExtendScript Examples

Update

Thanks to the generosity of many, Jason and I have reached our fundraising goals for the Ride! As a result, I am withdrawing the offer for the scripts. Thank you for your help!

If you attended the webinar on April 29, 2015, you saw some realistic examples of using ExtendScript to automate FrameMaker. The scripts are well-commented and ready for production work. If you are learning ExtendScript, you can use many of the functions and techniques in your own scripts.

Here is a PDF that describes each script.

Thank you for your generous support of a great cause!

Update

For those that received the scripts by donating, or saw them during the webinar, I am interested in your questions and feedback. Please add a comment to this post, and I will start a new post to discuss your questions and comments.

FrameMaker 12 ExtendScript: The Object Model

In a recent Adobe webinar, I used a chm file for FrameMaker 12 ExtendScript’s object model. Here is a link to the web site. Scroll to the bottom and you will see the link. After you download the chm, right+click on it and choose Properties. Click the Unblock button and you will be able to use the chm file.

The chm file has the same content as the ExtendScript Object Model Viewer, but in my opinion, is much easier to use. If you prefer HTML, there is a link to an HTML version as well.

Automatically Saving to MIF

It is not unusual to have “mixed” FrameMaker workflows where members of a team are using different versions of FrameMaker. Documents saved in a lower version can be opened with higher versions, but you can’t open documents saved with a higher version with a lower version of FrameMaker. There are two solutions: First, you can use the higher version to “save down” to the lower version. However, you can only save down to the next lowest version, for example, from FrameMaker 12 to FrameMaker 11. Second, you can save the document to MIF (Maker Interchange Format) in which case you can open it with any lower version of FrameMaker.

The main sticking point with saving to MIF is that you have to remember to do it. But with ExtendScript, you can automate this. You can create a script that will automatically save the document to MIF whenever you choose File > Save or press Control+S. When you are ready to pass the MIF file onto another team member that may be using a lower FrameMaker version, you know that it will always reflect the latest saved changes.

Here is how to set up the script below:

  1. Copy the code below and paste it into an empty text file.
  2. Save the text file to a convenient location with the name “SaveAsMif_Event.jsx”.
  3. Quit FrameMaker if it is running.
  4. Copy the file to C:\Users\<UserName>\AppData\Roaming\Adobe\FrameMaker\<Version>\startup, where <UserName> is your Windows login name and <Version> is the FrameMaker version that you are using. If the startup folder does not exist, create it.
  5. Start FrameMaker and test the script. Open a document, make some changes to it, and save it. You should see a corresponding MIF file in the same folder as the document.

If you have any questions, problems, or comments, please post them in the comments section. Here is a link to a video that walks through the creation of the script.

Notification (Constants.FA_Note_PostSaveDoc, true);

function Notify (note, object, sparam, iparam) {

    switch (note) {
        case Constants.FA_Note_PostSaveDoc :
        saveAsMif (object);
        break;
    }
}

function saveAsMif (doc) {
	
	// Get required parameters for the save function.
    var params = GetSaveDefaultParams();
    var returnParamsp = new PropVals();
    
    // Replace the .fm extension with .mif.
    var saveName = doc.Name.replace (/\.[^\.\\]+$/,".mif");
    
    // Get the FileType save parameter and set it to MIF.
    var i = GetPropIndex(params, Constants.FS_FileType);
    params[i].propVal.ival = Constants.FV_SaveFmtInterchange;

    // Save the document as MIF.
    doc.Save(saveName, params, returnParamsp);
}

FrameMaker ExtendScript Training

Adobe is hosting a pair of ExtendScript webinars, taught by Rick Quatro (me). Here is the press release and a link to the registration page. I hope to see you there!

Write your own FrameMaker ExtendScript, Part 1

Wed Jan 14 at 10 AM

Registration link: http://adobe.ly/1DOIa9x

In this two part series, FrameMaker maven Rick Quatro of Carmen Publishing will be walking you through the process of writing your own Extendscripts, and will include files you can download during the session. Rick’s previous session gave an excellent overview of Regular Expressions in FrameMaker. Join this two-part deep dive and discover how you can automate many functions w/in FrameMaker via your own, custom scripts.

Removing Conditions From Text and Table Rows – Part 4

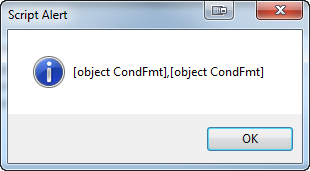
Before continuing our discussion of removing conditions from text, let’s take a look at table rows. Working with conditional table rows is easier that working with conditionalized text, so we can get this code out of the way. To set the stage, add a table to a document and apply two conditions, Condition1 and Condition2 to one of the rows. Select the conditionalized row and run this code:

#target framemaker

var doc = app.ActiveDoc;
var row = doc.SelectedTbl.TopRowSelection;

alert (row.InCond);

Condition Formats applied to the row

This is similar to what we did when working with a text range in Part 1, but more direct. Since we have a function for removing conditions from text, we can use this as a starting point for a table rows function.

function removeConditionsFromText (textRange, removeConditions, doc) {
    
    var prop, condFmts, i;
    
    // Get a list of the conditions applied to the beginning of the text range.
    prop = doc.GetTextPropVal (textRange.beg, Constants.FP_InCond);
    condFmts = prop.propVal.osval;
    if (condFmts.length === 0) {
        return; // No conditions are applied to the text range; exit the function.
    }

    // Loop through the condition format names that are applied to the text.
    for (i = 0; i < condFmts.length; i += 1) {
        // See if the format is in the remove list.
        if (removeConditions.indexOf (condFmts[i].Name) > -1) {
            // Remove it from the list.
            Array.prototype.splice.call (condFmts, i, 1);
        }
    }

    if (condFmts.length !== prop.propVal.osval.length) {
        // Conditions were removed; apply the updated list back to the text range.
        prop.propVal.osval = condFmts;
        doc.SetTextPropVal (textRange, prop);
    }
}

Let’s rework it together line-by-line: on line 1, change the name to removeConditionsFromRow and change the first argument from textRange to row.

function removeConditionsFromText (textRange, removeConditions, doc) {

We won’t need a prop variable so remove it from line 3:

function removeConditionsFromRow (row, removeConditions, doc) {
    
    var condFmts, i;

Lines 5-10 can be shortened to this:

function removeConditionsFromRow (row, removeConditions, doc) {
    
    var condFmts, i;
    
    // Get a list of the conditions applied to the row.
    condFmts = row.InCond;
    if (condFmts.length === 0) {
        return; // No conditions are applied to the row; exit the function.
    }

Lines 12-19 from the original function can be used as is, except for a minor change to the first comment:

function removeConditionsFromRow (row, removeConditions, doc) {
    
    var condFmts, i;
    
    // Get a list of the conditions applied to the row.
    condFmts = row.InCond;
    if (condFmts.length === 0) {
        return; // No conditions are applied to the row; exit the function.
    }

    // Loop through the condition format names that are applied to the row.
    for (i = 0; i < condFmts.length; i += 1) {
        // See if the format is in the remove list.
        if (removeConditions.indexOf (condFmts[i].Name) > -1) {
            // Remove it from the list.
            Array.prototype.splice.call (condFmts, i, 1);
        }
    }

    if (condFmts.length !== prop.propVal.osval.length) {
        // Conditions were removed; apply the updated list back to the text range.
        prop.propVal.osval = condFmts;
        doc.SetTextPropVal (textRange, prop);
    }
}

Finally, lines 21-25 of the original function can be changed to work with a row:

function removeConditionsFromRow (row, removeConditions, doc) {
    
    var condFmts, i;
    
    // Get a list of the conditions applied to the row.
    condFmts = row.InCond;
    if (condFmts.length === 0) {
        return; // No conditions are applied to the row; exit the function.
    }

    // Loop through the condition format names that are applied to the row.
    for (i = 0; i < condFmts.length; i += 1) {
        // See if the format is in the remove list.
        if (removeConditions.indexOf (condFmts[i].Name) > -1) {
            // Remove it from the list.
            Array.prototype.splice.call (condFmts, i, 1);
        }
    }

    if (condFmts.length !== row.InCond.length) {
        // Conditions were removed; apply the updated list back to the row.
        row.InCond = condFmts;
    }
}

Now we can test the finished function. Add the following code before the removeConditionsFromRow function and add the augmentObjects function to the end of the script. Select the table row that has Condition1 and Condition2 applied to it and run the complete script. You should see the Condition2 format removed from the selected row.

#target framemaker

// Call a function to add functions to built-in objects.
augmentObjects ();

var doc = app.ActiveDoc;

// List of conditions to remove.
var removeConditions = ["Condition2"];

// Remove the condition(s) from the selected row.
var row = doc.SelectedTbl.TopRowSelection;
removeConditionsFromRow (row, removeConditions, doc);

In an upcoming post, we will return to working removing conditions from text.

Easy Authoring In – Structured Content Out

Some of my work involves clients that submit content from authors and editors (produced on word processors like MS Word) that needs to be formatted for high-quality print output. I may be using InDesign or FrameMaker for the print output, but the process is pretty much the same: import the content into the page layout program and apply styles, etc. This can be a tedious, error-prone process, compounded by edits that happen after the pagination process has begun.

One possible solution that appeals to me is a light-weight editor that could be configured for content-specific authoring and editing. It would allow you to specify an underlying schema so you could control and guide the development of content. But it would also have a simple editing environment so that it would be easy to add and format content without messing with the underlying XML. The editor could have ways to insert commonly used items that conform to the required structure. And if such an environment was browser-based, it could make collaboration easier. With solid XML, I could then use XSLT to machine-convert the content to InDesign or FrameMaker for high-quality output.

I recently saw a demo for a product that may finally be the solution I have been looking for: FontoXML. First a disclosure: I am not in any way officially associated with them. But I was very impressed with what I saw. They developed FontoXML as a custom solution for several of their clients, but it was so well received that they decided to make a general-purpose product for others. I only saw an hour-long demo so I am not going to try to provide a detailed review, but here are some of the things I liked:

  • It was developed with a modular architecture that lends itself to customization and extension.
  • It can work with other schemas besides DITA, including custom schemas.
  • The authoring environment can be customized through HTML/CSS.
  • Placeholders and boilerplate content can be developed to streamline the authoring process.
  • It can be integrated with content management systems.
  • The demo was very polished and showed a high attention to detail.
  • The prices were very reasonable, even for small-volume clients.

I am sure there are similar products out there that I don’t know about. If you know of any, please feel free to leave a comment below. But, I would highly-recommend that you take a look at FontoXML. It is expected to ship 1st Q 2015.

Removing Conditions From Text and Table Rows – Part 3

Part 1 and Part 2 of this series show the beginning of the typical script development process that I use. I like to isolate scripting tasks to the smallest units possible. For this task, we worked on a single selection of conditionalized text in the active document. When we switched to tables, we selected a single row with conditions applied. This approach allows us to get the basic functionality working without worrying about the overhead that the larger script requires. Once the basic functionality is working, we can expand it to work on an entire document or book.

Let’s start by figuring out how to specify which Condition Formats to remove from the text and table rows in a document. To keep things simple, we can use an array of Condition Format names:

#target framemaker

var doc = app.ActiveDoc;

// Make an array of Condition Format names to remove.
var removeConditions = ["Condition2"];

Even if we add an interface to the script later (like a dialog box), we can still use an array to store the condition names. We need to figure out a way to compare the contents of the array with the conditions that are applied to a given range of text. To set this up, make sure you have a document open with two Condition Formats, Condition1 and Condition2, applied to a paragraph. Select some of the text in the paragraph. We can add our array to some of the code we previously developed:

#target framemaker

var doc = app.ActiveDoc;

// An array of condition formats to remove from the text and rows.
var removeConditions = ["Condition2"];

var textRange = doc.TextSelection;
var prop = doc.GetTextPropVal (textRange.beg, Constants.FP_InCond);
var condFmts = prop.propVal.osval;

// Display the condition format names that are applied to the text.
for (var i = 0; i < condFmts.length; i += 1) {
    alert (condFmts[i].Name);
}

The script will display each condition format that is applied to the selected text. We need a way to test each name and see if it is in the removeConditions array. Any conditions that are in the removeConditions array need to be removed from the condFmts list. In some implementations, a JavaScript array has an indexOf method so you can test and see if the array contains a particular member. If the member exists, indexOf returns the array index; otherwise, it returns -1. We could do this:

#target framemaker

var doc = app.ActiveDoc;

var removeConditions = ["Condition2"];

var textRange = doc.TextSelection;
var prop = doc.GetTextPropVal (textRange.beg, Constants.FP_InCond);
var condFmts = prop.propVal.osval;

// Loop through the condition format names that are applied to the text.
for (var i = 0; i < condFmts.length; i += 1) {
    // See if the format is in the remove list.
    if (removeConditions.indexOf (condFmts[i].Name) > -1) {
        // Remove it from the list.
        Array.prototype.splice.call (condFmts, i, 1);
    }
}

// Apply the updated list back to the text range.
prop.propVal.osval = condFmts;
doc.SetTextPropVal (textRange, prop);

The indexOf method is being used in the if statement on line 12. There is one problem with this code: The current Adobe ExtendScript implementation does not have an indexOf method on arrays. We are going to call (line 4 in the following code) a function (lines 27-45) that will augment the built-in Array object and add an indexOf method to it. Object augmentation is beyond the scope of this lesson, but google it if you are interested in how it works. Here is the entire code:

#target framemaker

// Call a function to add functions to built-in objects.
augmentObjects ();

var doc = app.ActiveDoc;

var removeConditions = ["Condition2"];

var textRange = doc.TextSelection;
var prop = doc.GetTextPropVal (textRange.beg, Constants.FP_InCond);
var condFmts = prop.propVal.osval;

// Loop through the condition format names that are applied to the text.
for (var i = 0; i < condFmts.length; i += 1) {
    // See if the format is in the remove list.
    if (removeConditions.indexOf (condFmts[i].Name) > -1) {
        // Remove it from the list.
        Array.prototype.splice.call (condFmts, i, 1);
    }
}

// Apply the updated list back to the text range.
prop.propVal.osval = condFmts;
doc.SetTextPropVal (textRange, prop);

function augmentObjects () {
    
    // Add an indexOf method to the Array object.
    if (!Array.prototype.indexOf) {
        Array.prototype.indexOf = function (obj, fromIndex) {
            if (fromIndex == null) {
                fromIndex = 0;
            } else if (fromIndex < 0) {
                fromIndex = Math.max(0, this.length + fromIndex);
            }
            for (var i = fromIndex; i < this.length; i++) {
                if (this[i] === obj) {
                    return i;
                }
            }
            return -1;
        };
    }
}

OK, we have the basic functionality working, so let's encapsulate it into a function that we easily drop into a bigger script. We want the function to take a text range, a list of conditions to remove, and a document object. Here is one way we can do this:

#target framemaker

// Call a function to add functions to built-in objects.
augmentObjects ();

var doc = app.ActiveDoc;

var removeConditions = ["Condition2"];
var textRange = doc.TextSelection;

// Remove the condition(s) from the selected text.
removeConditionsFromText (textRange, removeConditions, doc);

function removeConditionsFromText (textRange, removeConditions, doc) {
    
    var prop, condFmts, i;
    
    // Get a list of the conditions applied to the beginning of the text range.
    prop = doc.GetTextPropVal (textRange.beg, Constants.FP_InCond);
    condFmts = prop.propVal.osval;

    // Loop through the condition format names that are applied to the text.
    for (i = 0; i < condFmts.length; i += 1) {
        // See if the format is in the remove list.
        if (removeConditions.indexOf (condFmts[i].Name) > -1) {
            // Remove it from the list.
            Array.prototype.splice.call (condFmts, i, 1);
        }
    }

    // Apply the updated list back to the text range.
    prop.propVal.osval = condFmts;
    doc.SetTextPropVal (textRange, prop);
}

// augmentObjects function not shown but required!

Some important points:

  • The new function is on lines 14-34.
  • We followed best practices and declare all variables at the top of the function (line 16).
  • Because the function uses the indexOf method, we have to include the augmentObjects function in any script that uses our new function. In addition, we have to remember to call augmentObjects at the top of our script (like we do on line 4).
  • IMPORTANT: The script gets the condition format properties at the beginning of the text range. It removes the appropriate conditions from that list and then applies those properties to the entire text range. For this reason, we want to pass in text ranges that only have distinct condition formats applied to them. If you are not sure why, post a comment below.

Before moving on, there is one issue we should address. One line 32, we apply the updated list of conditions back to the propVal object; then line 33 applies the property list to the text range. But what if this list was empty to start with, or hasn't been changed by the loop on lines 23-29? There is no sense in going further, so let's add a couple of tests to the function. We can add this below line 20:

if (condFmts.length === 0) {
    return; // No conditions are applied to the text range; exit the function.
}

If there are no conditions applied to the text, then there are none that can be removed; so we simply exit the function. If there are conditions applied, they may be conditions that aren't in our removeConditions array. So we can test to make sure that conditions were actually removed before updating the text (this code would replace lines 31-33):

if (condFmts.length !== prop.propVal.osval.length) {
    // Conditions were removed; apply the updated list back to the text range.
    prop.propVal.osval = condFmts;
    doc.SetTextPropVal (textRange, prop);
}

Here is the finished function:

function removeConditionsFromText (textRange, removeConditions, doc) {
    
    var prop, condFmts, i;
    
    // Get a list of the conditions applied to the beginning of the text range.
    prop = doc.GetTextPropVal (textRange.beg, Constants.FP_InCond);
    condFmts = prop.propVal.osval;
    if (condFmts.length === 0) {
        return; // No conditions are applied to the text range; exit the function.
    }

    // Loop through the condition format names that are applied to the text.
    for (i = 0; i < condFmts.length; i += 1) {
        // See if the format is in the remove list.
        if (removeConditions.indexOf (condFmts[i].Name) > -1) {
            // Remove it from the list.
            Array.prototype.splice.call (condFmts, i, 1);
        }
    }

    if (condFmts.length !== prop.propVal.osval.length) {
        // Conditions were removed; apply the updated list back to the text range.
        prop.propVal.osval = condFmts;
        doc.SetTextPropVal (textRange, prop);
    }
}

In a future post, we will show how to loop through the text in a paragraph and isolate ranges of text that have distinct sets of conditions applied to them. These will get passed to our new removeConditionsFromText function to remove the specified conditions from paragraphs in a document. We will also develop a function that will remove conditions from table rows.

Removing Conditions From Text and Table Rows – Part 2

In the previous post, we gained a basic understanding of how to remove a CondFmt (Condition Format) from a text range. Let’s see it in action. To set this up, make sure you have a sample document with two conditions, Condition1 and Condition2, and have both conditions applied to a paragraph in the document. Select some of the text in the paragraph and run this:

#target framemaker

var doc = app.ActiveDoc;

var textRange = doc.TextSelection;
var prop = doc.GetTextPropVal (textRange.beg, Constants.FP_InCond);
var condFmts = prop.propVal.osval;

// Remove the second condtion format and update the osval list.
Array.prototype.splice.call (condFmts, 1, 1);
prop.propVal.osval = condFmts;

// Apply the updated list back to the text range.
doc.SetTextPropVal (textRange, prop);

To keep the example simple, we are making a couple of assumptions: First, we are removing Condition2 from the text and second, that Condition2 is the second CondFmt in the osval list. We will use code to eliminate these assumptions later.

On line 7, we assign the osval list to a variable (condFmts). We need a way to remove members from this condFmts list. If condFmts was a true JavaScript array, we could use its splice method to remove the desired member. But it is actually an array-like list of CondFmt objects that doesn’t contain a splice method. However, JavaScript allows us to “borrow” the splice method from the built-in Array object and use it on our list; this is what we are doing on line 10.

On line 11, we assign the modified list back to prop.propVal.osval and on line 14 we apply the updated property to the selected text. When you run this, you should see the Condition2 format removed from the selected text.

If we wanted to remove all formats from the text, we could use this shortcut:

#target framemaker

var doc = app.ActiveDoc;

var textRange = doc.TextSelection;
var prop = doc.GetTextPropVal (textRange.beg, Constants.FP_InCond);

// Remove all conditions from the text.
prop.propVal.osval.length = 0;

// Apply the updated list back to the text range.
doc.SetTextPropVal (textRange, prop);

Line 9 simply sets the length of the osval list to 0 (zero), which removes all of the members.

Conditionalized table rows are handled a little bit differently than text. To set this up, add a table to your document and apply Condition1 and Condition2 to one of the rows and leave the row selected. Run this code:

#target framemaker

var doc = app.ActiveDoc;

// Get the selected row object.
var tbl = doc.SelectedTbl;
var row = tbl.TopRowSelection;

// Display the list of Condition Formats applied to the row.
alert (row.InCond);

As you can see, the condition list is easier to get to with a table row than it is with text. Let’s splice the second member from the list and apply it back to the table row:

#target framemaker

var doc = app.ActiveDoc;

// Get the selected row object.
var tbl = doc.SelectedTbl;
var row = tbl.TopRowSelection;

// Remove the second condition from the list and update the row.
var inCond = row.InCond;
Array.prototype.splice.call (inCond, 1, 1);
row.InCond = inCond;

As with text, we can use a shortcut to remove all conditions from the row:

#target framemaker

var doc = app.ActiveDoc;

// Get the selected row object.
var tbl = doc.SelectedTbl;
var row = tbl.TopRowSelection;

// Remove all conditions from the list and update the row.
var inCond = row.InCond;
inCond.length = 0;
row.InCond = inCond;

In the next post, we will generalize this code into functions so that you can remove conditions from all of the text and table rows in a document.